
There are a couple of neat tricks you can use, but (naturally) they vary somewhat between PCs (I’m using Windows 10) and Macs (I’m still on OS X El Capitan – delaying my upgrade to Mojave because it will render my Word 2011 inoperable).
Snap your windows in Windows
To open your document or window to full screen, select its title bar and drag it right up to the top of your screen (or even past the top). Easy peasy – it expands to fill your screen!
I find this useful when I move a doc from one of my screens to another – the two screens I work with are slightly different sizes, but I can easily fill the new screen by dragging to the top as I move the doc over.
You can also easily drag your doc to fill half the screen. Again, select its title bar and drag to the left edge to fill the left side, or to the right edge to fill the right side.
There’s more on this on Microsoft Windows support: Snap your windows.
Hotspot corners on Macs
You can save yourself time by setting up hotspots on the screen corners of your Mac laptop.
Go to System Preferences > Mission Control and click on the Hot Corners button on the bottom left.
This will bring up the Active Screen Corners dialogue box.
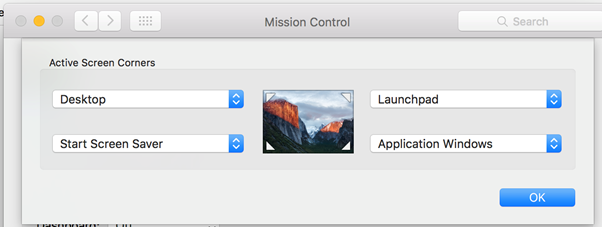
For each corner, you can select the destination or action you want to trigger when you drag your mouse into that corner. The options are:
- Mission Control (which shows all your active windows at once)
- Application Windows (which shows all windows of the current application at once)
- Desktop
- Dashboard
- Notification Centre
- Launchpad
- Start Screen Saver
- Disable Screen Saver
- Put Display to Sleep.
To get a similar (although more limited) function on a Windows machine, you can download an app called WinXCorners. There’s a little article about it on How-to Geek.
Once I installed this, I did have to be careful to aim at the centre of the top or edges when snapping my docs, as described above.
This article was first published in the Editors Victoria November 2018 newsletter.
See more tips & tricks.

Leave a comment